The Ultimate Guide to Solar Panel Cleaning: How to Maximize Energy Output, Extend System Life, and Protect Your Investment

Installing a solar photovoltaic (PV) system is one of the smartest long-term investments you can make for your home or business. A well-designed solar system can significantly reduce electricity bills, lower your carbon footprint, and provide reliable energy for 25 years or more. However, even the most efficient solar panels cannot perform at their best if dirt, dust, or debris blocks sunlight from reaching the photovoltaic cells.

Many solar system owners assume that rain keeps their panels clean. While rainfall can remove loose dust, it often leaves behind pollen, bird droppings, tree sap, mineral deposits, and other contaminants that gradually reduce energy production. In areas with high dust levels, heavy traffic, industrial pollution, or frequent bird activity, these deposits can build up much faster than many people realize.

During routine inspections, solar maintenance professionals often find that the dirtiest panels are not necessarily the oldest ones—they are the ones installed in environments where contamination accumulates quickly. A panel covered with bird droppings or a layer of dust may continue producing electricity, but its output can be noticeably lower than that of a clean panel operating under the same conditions.

Regular cleaning is therefore more than a cosmetic task. It is an important part of preventive maintenance that helps your system generate more electricity, reduces the risk of long-term surface damage, and protects the return on your solar investment.

In this guide, you’ll learn:

  • Why keeping solar panels clean matters
  • How dirt and debris affect electricity generation
  • How often solar panels should be cleaned
  • The safest cleaning methods
  • Common mistakes to avoid
  • When to hire a professional
  • Practical maintenance tips to maximize long-term performance

Whether you own a small residential rooftop system or manage a large commercial solar installation, these best practices will help you keep your system operating efficiently for years to come.

The Ultimate Guide to Solar Panel Cleaning: Maximize Efficiency, Lifespan, and ROI

Why Solar Panel Cleaning Matters

Solar panels generate electricity when sunlight strikes photovoltaic cells beneath a layer of protective glass. The more sunlight that reaches these cells, the more electricity the system can produce.

Over time, however, airborne particles and environmental contaminants begin to accumulate on the glass surface. This process—known in the solar industry as soiling—reduces the amount of sunlight reaching the cells. While a light layer of dust may have only a modest effect, heavier contamination can significantly reduce energy production, particularly when it covers multiple cells or creates uneven shading.

Common sources of solar panel soiling include:

  • Wind-blown dust
  • Pollen
  • Bird droppings
  • Tree sap
  • Leaves and organic debris
  • Vehicle emissions
  • Industrial pollution
  • Salt spray in coastal regions
  • Construction dust
  • Ash from wildfires or agricultural burning
  • Snow and ice in colder climates

Each environment presents different maintenance challenges. For example, homes near farmland often experience increased pollen and soil deposits during planting and harvesting seasons, while properties close to busy roads may accumulate oily residue and airborne pollutants more quickly.

Ignoring these contaminants for long periods can gradually reduce your system’s efficiency and, in some cases, contribute to uneven heating that places additional stress on the affected solar cells.


How Dirty Solar Panels Affect Performance

One of the most common misconceptions among solar owners is that a little dirt makes no difference. In reality, even partial shading can affect how efficiently a photovoltaic panel generates electricity.

Solar cells within a panel are electrically connected. When one section receives less sunlight because of dirt or bird droppings, it can reduce the output of neighboring cells. This phenomenon is one reason why localized contamination often has a greater impact than many people expect.

The degree of energy loss depends on several factors, including:

  • The type of contaminant
  • The amount of surface coverage
  • Panel tilt angle
  • Local weather conditions
  • Rainfall frequency
  • Air pollution levels
  • Bird activity
  • Seasonal pollen

For example, a thin layer of dust spread evenly across a panel may reduce output only slightly. By contrast, thick bird droppings covering a small area can create concentrated shading that affects a disproportionately large portion of the panel’s performance.

Modern solar monitoring systems often allow homeowners to track daily and monthly energy production. If you notice a gradual decline in output despite similar weather conditions, accumulated dirt may be one of the first things to investigate.


Benefits of Regular Solar Panel Cleaning

Cleaning your solar panels on a regular schedule offers several important advantages beyond simply improving appearance.

1. Increased Energy Production

Clean panels allow more sunlight to reach the photovoltaic cells, helping the system generate electricity closer to its rated capacity. Although the exact improvement varies by location and environmental conditions, removing accumulated dirt can restore energy production that would otherwise be lost.

2. Better Return on Investment (ROI)

Solar systems represent a significant financial investment. Every additional kilowatt-hour your system produces offsets electricity purchased from the utility grid. Keeping panels clean helps maximize these savings throughout the system’s lifespan.

For homes participating in net metering or feed-in tariff programs, maintaining higher energy production may also increase the value of electricity exported back to the grid.

3. Longer Equipment Life

Routine cleaning provides an opportunity to inspect your system for potential problems such as cracked glass, loose mounting hardware, damaged wiring, corrosion, or deteriorating seals.

Identifying these issues early can prevent more expensive repairs and help extend the operational life of your solar installation.

4. Improved Safety

During scheduled maintenance, installers or homeowners can also identify hazards such as loose cables, nests built beneath panels, blocked drainage paths, or damaged roof flashing before they become serious problems.

5. Preserved Manufacturer Warranty

Many manufacturers recommend periodic inspections and proper maintenance throughout the life of the system. While routine cleaning alone may not be a warranty requirement, following the manufacturer’s care recommendations helps ensure the equipment remains in good condition.


Signs Your Solar Panels Need Cleaning

Solar panels don’t always look obviously dirty from the ground. In many cases, performance declines gradually before homeowners notice visible contamination.

Consider inspecting your panels if you observe any of the following:

  • Visible dust covering the glass
  • Bird droppings that remain after rainfall
  • Leaves or branches shading part of the array
  • Tree sap or sticky residue
  • Uneven discoloration across the panel surface
  • Mineral deposits or water spots
  • Noticeable decline in energy production
  • Heavy pollen accumulation during spring
  • Construction dust after nearby building work
  • Ash or soot following storms or wildfire events

Monitoring software provided with many modern inverters can be particularly helpful. If your system consistently generates less electricity than expected under similar weather conditions, a visual inspection is often the next logical step.

As a general rule, don’t wait until panels appear heavily soiled. A simple inspection every few months—especially after storms, high winds, or seasonal pollen events—can help identify when cleaning is actually needed rather than relying on a fixed schedule alone.

How Often Should You Clean Solar Panels?

There isn’t a one-size-fits-all cleaning schedule for every solar installation. The ideal frequency depends on your local environment, weather conditions, roof angle, and nearby sources of dust or debris.

For example, a home in a suburban neighborhood that receives regular rainfall may only need cleaning once or twice a year. On the other hand, a system installed near farmland, construction sites, factories, or busy roads may require much more frequent maintenance to maintain peak performance.

Rather than relying solely on a calendar, combine routine visual inspections with your solar monitoring data. If electricity production drops without an obvious change in weather or seasonal sunlight, it’s worth checking whether dirt or debris is affecting the panels.

Recommended Cleaning Frequency

Installation EnvironmentSuggested InspectionTypical Cleaning Frequency
Residential areas with regular rainfallEvery 3 monthsEvery 6–12 months
Dusty or desert regionsMonthlyEvery 2–4 months
Agricultural areasEvery 2 monthsEvery 3–6 months
Industrial locationsMonthlyEvery 2–3 months
Coastal propertiesEvery 2–3 monthsEvery 3–4 months
Areas with frequent bird activityMonthlyAs needed after inspection

These are general recommendations. Always adjust your maintenance schedule based on actual panel condition and energy production rather than following fixed dates alone.


Factors That Influence Cleaning Frequency

Several environmental factors determine how quickly contaminants accumulate on solar panels.

Local Climate

Dry climates typically experience more airborne dust, while humid regions often see pollen, algae, or mold developing on panel surfaces. Coastal environments expose panels to salt deposits that can build up over time if not removed.

Roof Angle

Panels installed at steeper angles generally shed dust and rainwater more effectively than flat or low-slope installations. Flat-mounted systems usually require more frequent inspections because debris is less likely to wash away naturally.

Nearby Trees

Trees provide welcome shade for buildings, but they also increase maintenance needs. Leaves, pollen, seeds, and sticky tree sap can accumulate on panels throughout the year.

If birds frequently perch on nearby branches, droppings may also become a recurring issue.

Construction Activity

If new buildings, roads, or landscaping projects are taking place nearby, expect significantly higher levels of airborne dust. Temporary increases in cleaning frequency during construction can help prevent unnecessary energy losses.

Seasonal Changes

Many homeowners notice that their panels become dirtiest during specific times of the year rather than gradually throughout all seasons. Understanding these seasonal patterns helps create a more effective maintenance schedule.


Seasonal Solar Panel Cleaning Guide

Every season brings different maintenance challenges. Adjusting your inspections throughout the year helps keep your solar system operating efficiently.

Spring

Spring often brings large amounts of pollen, flower petals, and tree sap. These materials may not wash away completely with rain and can gradually form a sticky layer on the panel surface.

During spring inspections:

  • Remove pollen buildup.
  • Check for tree sap.
  • Inspect for nests built by birds beneath the panels.
  • Verify that nearby trees are not creating new shading.

Summer

Long daylight hours mean maximum energy production, making summer an important season for maintaining clean panels.

Look for:

  • Wind-blown dust
  • Bird droppings
  • Dry leaves
  • Insect residue

In particularly dry regions, dust can accumulate surprisingly quickly, even after only a few weeks without rain.

Autumn

Falling leaves and twigs are the biggest concern during autumn.

Inspect for:

  • Leaves trapped beneath panel frames
  • Organic debris blocking drainage
  • Branches creating shade
  • Moss growth in damp environments

Keeping debris off the roof also helps prevent water from pooling around the mounting system.

Winter

Winter maintenance varies greatly depending on location.

In areas that experience snow:

  • Allow snow to slide off naturally whenever possible.
  • Never use metal tools to remove ice.
  • Avoid striking frozen panels.
  • Inspect mounting hardware after severe storms.

Most modern solar panels are designed to withstand snow loads, but heavy accumulations may temporarily reduce electricity production until sunlight reaches the cells again.


Best Time of Day to Clean Solar Panels

Choosing the right time of day is almost as important as choosing the right cleaning method.

The safest and most effective times include:

  • Early morning
  • Late afternoon
  • Overcast days with mild temperatures

Avoid cleaning during the hottest part of the day.

When panels are exposed to intense sunlight, the glass surface can become extremely hot. Spraying cold water onto hot panels may create unnecessary thermal stress, while water evaporates so quickly that it often leaves mineral spots and streaks before cleaning is complete.

Cooler conditions allow water to remain on the surface longer, making it easier to loosen dirt and rinse away contaminants thoroughly.


Equipment You’ll Need

Using the correct equipment helps protect the anti-reflective coating found on most modern solar panels.

Professional installers typically recommend the following tools:

  • Soft microfiber cloths
  • Non-abrasive sponges
  • Soft-bristle brushes
  • Extension poles with padded cleaning heads
  • Rubber squeegee
  • Low-pressure garden hose
  • Bucket of clean water
  • Distilled or deionized water when available
  • Safety gloves
  • Non-slip footwear
  • Fall-protection equipment for roof work

For larger residential or commercial systems, water-fed pole systems using purified water can clean panels efficiently while minimizing streaks.


Step-by-Step Solar Panel Cleaning Process

Cleaning solar panels is relatively straightforward, but taking the proper approach helps prevent accidental damage.

Step 1: Review the Manufacturer’s Instructions

Before cleaning, check the maintenance recommendations provided by the panel manufacturer. Some manufacturers specify approved cleaning products or methods, while others recommend avoiding certain chemicals or equipment.

Following these guidelines helps protect both your equipment and any applicable warranty.


Step 2: Shut Down the Solar System

If your system requires roof access, follow the manufacturer’s shutdown procedure before beginning work.

Turning off the system reduces electrical risks while allowing you to work more safely around cables and connectors.

If you are unsure how to isolate the system safely, contact your installer before attempting maintenance.


Step 3: Perform a Visual Inspection

Before applying water, inspect the panels carefully.

Look for:

  • Cracked glass
  • Loose mounting brackets
  • Damaged wiring
  • Burn marks
  • Corrosion
  • Loose connectors
  • Animal nests
  • Signs of water intrusion

If you discover physical damage, postpone cleaning until the issue has been inspected by a qualified technician.


Step 4: Remove Loose Debris

Begin by gently rinsing the panels with clean, low-pressure water.

This removes:

  • Dust
  • Sand
  • Dry leaves
  • Loose dirt
  • Surface pollen

Removing loose particles first reduces the risk of scratching the glass during wiping.

Never use pressure washers, as high-pressure water can damage seals, electrical connections, and mounting components.


Step 5: Clean the Surface Gently

Using a soft sponge or microfiber cloth, clean the glass with clean water.

If necessary, use a small amount of mild soap approved by the panel manufacturer to loosen stubborn residue.

Avoid applying excessive pressure.

The goal is to lift contaminants from the surface—not scrub them aggressively.


Step 6: Remove Stubborn Bird Droppings

Bird droppings are one of the most common causes of localized shading.

Rather than scraping dried deposits, soak them with water for several minutes until they soften naturally.

Then wipe them away gently using a microfiber cloth or soft sponge.

Patience is far safer than force.


Step 7: Rinse Thoroughly

After cleaning, rinse the panels completely to remove any remaining soap or residue.

Leftover cleaning products can attract dirt over time or leave visible streaks that reduce light transmission.

Whenever possible, use deionized or distilled water for the final rinse, particularly in areas with hard water.


DIY vs. Professional Solar Panel Cleaning: Which Option Is Right for You?

One of the most common questions solar system owners ask is whether they should clean their panels themselves or hire a professional. The answer depends on several factors, including the size of the system, roof accessibility, the level of dirt buildup, and your comfort working at heights.

For many homeowners, light cleaning of easily accessible, ground-mounted solar panels can be done safely with the right tools and proper precautions. However, rooftop systems often present additional safety risks that make professional cleaning a worthwhile investment.

When DIY Cleaning Makes Sense

If your solar panels are easy to reach without climbing onto a steep roof, cleaning them yourself can be both practical and cost-effective.

DIY cleaning is generally suitable when:

  • The system is ground-mounted or installed on a single-story home.
  • The panels require only light cleaning.
  • You have the recommended cleaning equipment.
  • The manufacturer’s maintenance guidelines permit owner cleaning.
  • You can work safely without risking a fall.

A simple rinse followed by gentle cleaning with purified water and a microfiber cloth is often sufficient to remove dust and light debris.

However, safety should always take priority over saving money. If reaching the panels requires walking on a steep roof or working near electrical components, professional assistance is the safer choice.


When It’s Best to Hire a Professional

Professional solar panel cleaning companies have specialized equipment, safety training, and experience inspecting photovoltaic systems. In addition to cleaning the panels, technicians often identify maintenance issues that homeowners might overlook.

Professional cleaning is recommended for:

  • Multi-story homes
  • Commercial buildings
  • Large residential systems
  • Solar farms
  • Panels installed on steep or fragile roofs
  • Systems with significant bird droppings or tree sap
  • Installations requiring safety harnesses or elevated work platforms

Many service providers also perform basic system inspections during cleaning, checking for loose wiring, damaged mounting hardware, cracked glass, corrosion, or signs of water intrusion.

These preventive inspections can help identify small problems before they become expensive repairs.


Comparing DIY and Professional Cleaning

FactorDIY CleaningProfessional Cleaning
Initial CostLowerHigher
SafetyDepends on roof accessHigh with trained technicians
Equipment QualityBasic household toolsSpecialized professional equipment
Inspection IncludedLimitedComprehensive visual inspection
Cleaning QualityGood for light soilingExcellent for heavy contamination
Risk of DamageHigher if improper tools are usedLower when performed by experienced professionals

For many homeowners, a practical approach is to perform regular visual inspections themselves while scheduling a professional cleaning and inspection once every year or two.


Solar Panel Cleaning Safety Tips

Solar panel maintenance should never compromise personal safety. Most injuries associated with solar cleaning are related to falls rather than the panels themselves.

Before beginning any cleaning project, consider the following safety guidelines.

1. Turn Off the System

Always follow the shutdown procedure recommended by your installer or equipment manufacturer before performing maintenance.

Although solar panels continue generating electricity when exposed to sunlight, isolating the system reduces unnecessary electrical risks while working around cables and connectors.

2. Never Walk on Solar Panels

Solar panels are engineered to withstand wind, hail, and snow loads—not the concentrated weight of a person.

Walking directly on the panels can:

  • Crack the protective glass
  • Damage photovoltaic cells
  • Void manufacturer warranties
  • Reduce long-term performance

Always work from the roof surface or use appropriate extension tools instead of stepping onto the panels.

3. Use Proper Fall Protection

If roof access is necessary:

  • Use a stable ladder.
  • Wear non-slip footwear.
  • Secure the ladder on a level surface.
  • Use an approved safety harness when appropriate.
  • Avoid working alone.

If conditions feel unsafe, postpone the work or hire a qualified professional.

4. Avoid Cleaning During Bad Weather

Never clean solar panels during:

  • Rain
  • High winds
  • Thunderstorms
  • Frost or icy conditions
  • Extreme heat

Wet roofs become extremely slippery, increasing the likelihood of accidents.


Cleaning Products You Should Never Use

Solar panels are protected by a durable, anti-reflective glass coating that helps maximize sunlight absorption. While this coating is designed to withstand outdoor conditions, harsh cleaning products can permanently damage it.

Avoid using:

  • Abrasive scouring pads
  • Steel wool
  • Wire brushes
  • Harsh household detergents
  • Bleach
  • Ammonia-based cleaners
  • Strong solvents
  • Acidic cleaning solutions
  • Pressure washers
  • High-pressure steam cleaners

Instead, use clean water, a soft microfiber cloth, and—if recommended by the manufacturer—a mild, non-abrasive cleaning solution specifically formulated for solar panels.


Common Solar Panel Cleaning Mistakes

Even well-intentioned maintenance can reduce panel performance if the wrong methods are used.

Cleaning During Midday

Cleaning hot panels causes water to evaporate quickly, leaving mineral deposits and streaks behind. Sudden temperature changes may also place unnecessary stress on the glass.

Using Hard Water Without Rinsing

Hard water contains minerals that remain on the surface after evaporation, reducing light transmission over time.

Whenever possible, perform a final rinse with distilled or deionized water.

Scrubbing Too Aggressively

Stubborn stains should be soaked and loosened rather than scrubbed with excessive force.

Aggressive scrubbing increases the risk of scratching the protective coating.

Ignoring Performance Monitoring

Many homeowners only inspect their panels when visible dirt appears.

Regularly checking your inverter or monitoring app helps identify gradual performance declines before they become significant.

Forgetting Nearby Vegetation

Trees continue growing long after a solar installation is completed.

Trim branches periodically to reduce shading, leaf accumulation, and bird activity above the panels.


Does Rain Clean Solar Panels?

Rain helps—but it should not be considered a complete cleaning solution.

Light rainfall usually removes loose dust from the surface, but it rarely eliminates contaminants such as:

  • Bird droppings
  • Sticky pollen
  • Tree sap
  • Industrial pollution
  • Salt deposits
  • Oily residue from vehicle emissions

In some regions, rainwater itself may contain airborne pollutants that leave additional residue after drying.

Think of rainfall as a natural rinse rather than a complete maintenance strategy.

Regular inspections remain the most reliable way to determine when manual cleaning is necessary.


Commercial Solar Panel Cleaning

Commercial and utility-scale solar installations require a more structured maintenance approach than residential systems.

Because these systems often consist of hundreds or thousands of panels, even small efficiency losses can translate into significant financial impacts over time.

Professional commercial maintenance programs typically include:

  • Scheduled cleaning based on environmental conditions
  • Drone-assisted visual inspections
  • Thermal imaging to identify hotspots
  • Performance benchmarking
  • Electrical safety inspections
  • Mounting structure assessments
  • Preventive maintenance reporting

Many commercial operators also use purified-water cleaning systems that leave no mineral residue, allowing large arrays to be cleaned efficiently without the need for detergents.

By combining routine inspections with scheduled cleaning, businesses can maintain consistent energy production, reduce downtime, and protect the long-term value of their solar investment.

Part 4: Cost, Maintenance Checklist, Environmental Benefits, FAQs & Conclusion

How Much Does Solar Panel Cleaning Cost?

The cost of professional solar panel cleaning varies depending on several factors, including the size of the solar array, roof accessibility, geographic location, and the amount of dirt or debris that has accumulated.

While prices differ between service providers, most homeowners find that routine cleaning is a relatively small expense compared to the long-term financial benefits of maintaining optimal energy production.

Factors that influence cleaning costs include:

  • Number of solar panels
  • Roof height and slope
  • Ease of roof access
  • Type and severity of contamination
  • Location of the property
  • Whether inspection services are included
  • Frequency of scheduled maintenance

Some cleaning companies offer annual maintenance plans that include regular inspections, panel cleaning, and basic system health checks. These plans can be particularly beneficial for homeowners living in dusty, coastal, or high-pollution environments where panels require more frequent attention.

Rather than focusing solely on the cost of cleaning, consider the value of maintaining consistent electricity generation throughout the system’s lifespan. Preventive maintenance often costs far less than the revenue or energy savings lost from reduced panel performance.


Solar Panel Maintenance Checklist

Cleaning is only one aspect of proper solar system maintenance. Performing regular inspections helps identify potential issues before they develop into expensive repairs.

Use the following checklist throughout the year:

Monthly

  • Review energy production using your monitoring system.
  • Look for sudden drops in performance.
  • Check for new shading caused by growing trees or nearby construction.

Every Three to Six Months

  • Inspect panel surfaces for dust, bird droppings, leaves, and tree sap.
  • Remove debris from around the array.
  • Check that rainwater drains freely around the panels.
  • Inspect visible wiring for signs of wear or animal damage.

Annually

  • Schedule a professional inspection if roof access is difficult.
  • Verify that mounting hardware remains secure.
  • Inspect roof penetrations and flashing for signs of leaks.
  • Check the inverter for warning lights or error messages.
  • Confirm that ventilation around electrical components remains unobstructed.

After Severe Weather

Following storms, hail, or strong winds:

  • Inspect the panels for cracks or chips.
  • Look for loose mounting brackets.
  • Check for fallen branches or debris.
  • Monitor system output over the following days for unexpected performance changes.

Keeping a simple maintenance log can also help identify gradual changes in system performance over time.


Environmental Benefits of Keeping Solar Panels Clean

A well-maintained solar energy system contributes more effectively to a cleaner and more sustainable energy future.

When solar panels operate efficiently, they produce more renewable electricity using the same amount of installed equipment. This helps reduce reliance on fossil fuel-generated power and lowers greenhouse gas emissions associated with traditional electricity production.

Regular cleaning also supports sustainability by:

  • Maximizing renewable energy generation.
  • Reducing unnecessary electricity imports from the grid.
  • Extending the service life of solar equipment.
  • Lowering the environmental impact associated with manufacturing replacement components.
  • Reducing electronic waste by helping systems remain operational for decades.

Although cleaning requires a small investment of time or resources, the long-term environmental benefits often outweigh the maintenance effort.


How Regular Cleaning Improves Return on Investment (ROI)

Installing a solar energy system is a long-term financial decision. Every kilowatt-hour generated helps offset electricity purchased from your utility provider.

When dirt, pollen, bird droppings, or other contaminants reduce panel performance, the system generates less electricity than it is capable of producing. Over months and years, these seemingly small losses can accumulate into a noticeable reduction in energy savings.

Routine cleaning helps maximize your return on investment by:

  • Increasing annual electricity production.
  • Shortening the system’s payback period.
  • Improving long-term energy savings.
  • Supporting higher export values for homes participating in net metering or feed-in tariff programs.
  • Helping maintain consistent performance throughout the system’s expected lifespan.

For businesses operating large solar installations, even modest improvements in system efficiency can translate into substantial financial gains over many years.


Frequently Asked Questions

Does rain clean solar panels?

Rain removes loose dust, but it typically does not remove bird droppings, tree sap, pollen, oily residue, or mineral deposits. Regular inspections remain the best way to determine whether manual cleaning is necessary.


How often should solar panels be cleaned?

Most residential systems benefit from cleaning every six to twelve months. However, installations in dusty, coastal, agricultural, or industrial environments may require more frequent maintenance.


Can dirty solar panels reduce electricity production?

Yes. Dirt and debris reduce the amount of sunlight reaching the photovoltaic cells, which can lower electricity generation. The degree of impact depends on the type and amount of contamination.


Is it safe to use a pressure washer?

No. High-pressure water can damage seals, electrical connections, and mounting components. A low-pressure hose or purified-water cleaning system is much safer.


Can I use dish soap?

If the panel manufacturer approves it, a small amount of mild, non-abrasive soap may be used when necessary. Avoid harsh detergents, bleach, ammonia, or solvent-based cleaners.


Should I walk on my solar panels?

No. Walking on solar panels can crack the glass, damage internal cells, and potentially void the manufacturer’s warranty.


What type of water is best?

Deionized or distilled water is ideal because it leaves minimal mineral residue after drying. If using tap water, rinse thoroughly to reduce spotting.


Does snow damage solar panels?

Most modern solar panels are engineered to withstand typical snow loads. However, heavy snow temporarily blocks sunlight until it melts or slides off naturally.


How do I know if my panels need cleaning?

Monitor your inverter or solar monitoring app. If electricity production declines despite similar weather conditions, inspect the panels for dirt or debris.


Is professional cleaning worth the cost?

For difficult roof access, large systems, or heavily soiled panels, professional cleaning often provides greater safety, a more thorough inspection, and better long-term maintenance.


Final Thoughts

Solar panels require relatively little maintenance compared with many other home improvements, but they should never be completely ignored.

Routine inspections, timely cleaning, and preventive maintenance help ensure that your system continues producing electricity efficiently year after year.

Whether you choose to clean your panels yourself or hire a qualified professional, the key is consistency. Removing dirt before it becomes severe, monitoring system performance regularly, and following manufacturer recommendations can extend the life of your solar installation while protecting the financial return on your investment.

Rather than waiting until energy production declines noticeably, make solar panel maintenance part of your regular property care routine. A small investment in preventive maintenance today can help your solar system deliver reliable, clean energy for decades to come.


Conclusion

Solar energy is one of the most dependable and cost-effective renewable energy solutions available today, but its long-term success depends on proper maintenance. Clean solar panels capture more sunlight, generate more electricity, and help maximize the value of your investment.

By understanding how environmental conditions affect panel performance, following safe cleaning practices, and scheduling regular inspections, homeowners and businesses can maintain high system efficiency while reducing the likelihood of costly repairs.

Whether your solar array is installed on a residential rooftop or a large commercial facility, a proactive maintenance plan will help ensure reliable energy production throughout its lifespan.

Remember: A clean solar panel isn’t just about appearance—it’s about protecting performance, extending equipment life, and getting the most from every ray of sunshine.

Why Folding Solar Panels Are Perfect for Remote Camping

Folding Solar Panels

Camping in remote spots is one of the best ways to get away from noise and reconnect with nature. But remote places often lack power. That makes it hard to use devices, charge batteries, or run small appliances. Folding solar panels solve this problem. They are compact, lightweight, and easy to use. This blog explains why folding solar panels are an ideal choice for remote camping and for people who travel in caravans.

What are Folding Solar Panels?

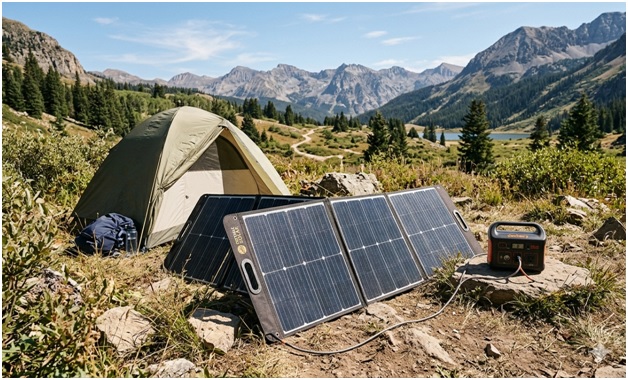
A folding solar panel is a portable solar array built into a case or hinged sections. Each section has one or more solar cells. When folded, the unit becomes flat and compact. When opened, it exposes a larger surface to the sun. Many models include a carry handle, built-in kickstand, or protective cover. Some have an integrated charge controller and outputs for USB, 12V, or DC connectors.

Benefits for Remote Camping

Portability and Low Weight

Folding solar panels are light and easy to carry. Hikers and campers can put them in a backpack or vehicle without much hassle. This makes them perfect for tents, shelters, or off-grid cabins. You don’t need a heavy battery bank or a generator to get basic power.

Fast Setup and Use

Setting up a folding solar panel takes minutes. Lay it on the ground, angle it toward the sun, and connect your device. There is no need to install permanent mounts or run cables. This speed is useful for short stays or when you move campsites frequently.

Flexible Charging Options

Most folding solar panels offer multiple output ports. You can charge phones, tablets, cameras, and power banks through USB. Many models also provide 12V output or DC tips to charge portable fridges, lights, or battery packs used in caravans. This flexibility makes the folding solar panel fit different camping needs.

Good Efficiency for Small Loads

Modern folding solar panels use high-efficiency solar cells. These deliver enough power to keep devices charged during the day. For basic power needs—lighting, communications, and small appliances—a folding solar panel is often enough. When paired with a small battery or power bank, it provides reliable overnight power.

Durability and Weather Resistance

Many folding solar panels are built for outdoor use. They have weather-resistant materials, reinforced corners, and protective covers. Some come with dust- and water-resistance ratings. This helps them survive rough outdoor conditions common in remote camping.

Why Caravans Use Folding Solar Panels

Space-Saving Design

Caravans usually have limited storage space. Folding solar panels can be folded flat and stowed easily. They allow travelers to carry extra solar capacity without taking up permanent roof space. This is useful for people who rent or use multiple vehicles.

Supplemental Power

Folding solar panels for caravans provide supplemental power to the caravan’s main electrical system. They can top up leisure batteries during the day. This reduces the need to run the vehicle engine for charging or to rely on campsite hookups.

Portable Backup

A folding solar panel doubles as a portable backup if the caravan’s rooftop panels fail or produce less power. You can move the folding panel to a sunny spot on the ground while parked under trees or in partial shade. That flexibility lets you maximize solar gain in varied conditions.

What to Consider When Choosing a Folding Solar Panel

Power Output and Wattage

Choose a folding solar panel with enough wattage for your needs. Small units (10–30W) can charge phones and small devices. Medium units (50–120W) can run fridges, charge batteries, and support campervan appliances. Larger folding solar panels are available, but check the weight and size before buying.

Port Types and Compatibility

Check the output ports. USB-A and USB-C are handy for phones and tablets. 12V outputs and DC tips work with camping fridges, lights, and battery chargers. Some panels include an integrated MPPT or PWM charge controller; others require an external controller when charging 12V battery systems.

Build Quality and Durability

Look for robust materials and reinforced edges. Weather resistance ratings (IP ratings) are useful for rainy or dusty environments. Check how well the folding joints hold up under repeated use. Also confirm whether the surface is scratch-resistant and whether the panel includes a protective carrying case.

Weight and Packability

Balance power needs with weight. Higher wattage usually means heavier panels. For long treks, prioritize lightweight panels. For vehicle-based camping or caravans, you can choose heavier but higher-output models.

Compatibility with Battery Systems

If you plan to charge a caravan or portable battery, make sure the folding solar panel works with your battery type (lead-acid, AGM, GEL, or lithium). If the panel lacks an internal charge controller, buy an MPPT controller for improved charging efficiency and battery protection.

Practical Tips for Using Folding Solar Panels While Camping

Positioning for Maximum Sun

Point the panel toward the sun for the best output. Early morning and late afternoon produce less power than midday. Use a fold-out stand or prop the panel on rocks to get the ideal angle. For best results, reorient the panel every 1–2 hours as the sun moves.

Avoid Shade and Reflections

Even small shadows can cut output dramatically. Keep the panel clear of shade from trees, tents, and people. Avoid placing shiny objects nearby that can reflect light away from the panel surface.

Store and Transport Carefully

Folded panels are built to be transportable, but they still need care. Keep them in their case, and avoid placing heavy items on top. Clean the surface with a soft cloth to remove dust and dirt before and after use.

Use a Battery Buffer for Steady Power

Solar energy varies during the day. A battery bank or portable power station smooths out fluctuations and stores energy for night use. Even a small 20,000 mAh power bank can make a big difference for overnight lighting, phone charging, or running small devices.

Combine Panels When Needed

If one folding solar panel doesn’t supply enough power, connect two panels in parallel or series if the manufacturer supports it. This increases output or voltage to match larger battery systems. Always check compatibility before linking multiple panels.

Common Myths and Facts

Myth: Folding Panels Don’t Generate Enough Power

Fact: Modern folding solar panels can have high-efficiency cells that produce enough energy for common camping needs. Wattage and sunlight exposure determine real output.

Myth: They Are Fragile and Break Easily

Fact: Quality folding solar panels are designed for outdoor use and are rugged. Look for reinforced edges and good warranties.

Myth: Only Useful for Short Trips

Fact: With the right wattage and a battery buffer, folding solar panels can support longer off-grid trips and caravan stays.

Example Setup for a Weekend Camping Trip

  • Folding solar panel: 80W, folding design with carry handle.
  • MPPT charge controller: Matches panel to a 12V battery.
  • Battery pack: 100–200Wh portable power station or a 12V leisure battery.
  • Outputs: USB for phones, 12V for fridge, AC inverter only if needed.
  • Extras: Extra cables, a small folding stand, and a protective bag.

Conclusion

Folding solar panels bring practical power to remote camping. They are portable, easy to use, and flexible. For caravans, they add useful supplemental power and a portable backup option. Choosing the right wattage, connectors, and build quality will make a folding solar panel one of the most helpful tools on your next trip off the grid. Use a battery buffer for overnight needs and follow simple setup tips to get the most from your solar kit.

How Much Does Transport and Logistics App Development Cost?

Logistics App

You just imagine conducting a transport and logistics business; generally, you will see that there are trucks rolling on, warehouses operating, and drivers making the deliveries. At that moment, your customers expect updates, and you also see your operational team get confused with calls and sheets; at that time, you need to go totally digital. A logistics app could automate deliveries, optimize routes, and also keep the customers informed. But also, one question stands: “How much does it cost to develop a logistics app?

In this comprehensive blog, you will explore the overview of the logistics industry, logistics app development cost, what affects it, and how you can build an efficient app without any overspending. While you are exploring transport & logistics app development, thinking about the cost of the logistics app development, or estimating your logistics mobile app development cost, this insightful blog can be your go-to resource.

Logistics App

Market Overview of Transport & Logistics Industry

The global logistics industry is growing a lot, with a market size estimated to grow from $11.23 trillion in 2025 to $23.14 trillion by 2034, with an estimated CAGR of 8.4%. On the contrary, the digital logistics market is estimated to reach about $93 billion by 2030, as per the statistical data.


As the customer expectations are so high, transparent delivery is enhanced a lot with the massive investment in digital tools that clearly state that the logistics app development cost is not just a budget thing but totally a strategic move to capture the business growth.

How Much Does Logistics App Development Cost in 2025?

The cost of logistics app development is based on how complex your app is, the location type, and the features.

Let’s see the breakdown of the cost of app types as per the cost.

Simple App
In this basic app, the cost ranges from around $11,000 to $50,000 approximately in the logistics space.

Mid-Level App
The medium- or mid-level app costs around $200,000 or more based on the medium-level features, like route optimization and an admin dashboard, and much more.

Customized App
This custom or advanced type of app costs approximately $200,000-$300,000 or more. It is totally based on the features like AI integration, IoT integrations & multi-region support.

So, if you are thinking of establishing an app in countries like Vietnam or India, the estimated cost ranges from $11,000. On the other hand, in the USA and Western Europe regions, it is generally higher due to the developer’s hourly rate.

Major Factors Affecting Logistics App Development Cost

 The key factors that affect the transport and logistics app development cost are as follows:

  • Complexity of App

So, the more you go for the advanced app, the higher the cost. A basic app may consist of:

  • User Registration
  • Delivery Scheduling
  • Real-Time Tracking
  • Payment Integration Modes

A more enhanced version of the app will have features like tracking routes, warehouse management, automated invoice systems, and driver performance analysis, which, as a result, upscale the logistics mobile app development cost.

  • Choice of Platform

So, the selection of a platform between Android, iOS, and the cross-platform development approaches can also affect the total transport and logistics app development cost. Some of the popular frameworks that are associated with the cross-platform or hybrid type, like Flutter or React Native, help in minimizing the cost while maintaining the performance level without any compromise.

  • Development Team Location

There are hourly rates that mainly differ as per the regions; in the case of the North American region, it is almost $80–$150/hr, in Europe, it is $50–$100/hr, and in the Asian region, it is around $25–$60/hr. And the outsourcing can help you to minimize the logistics app development cost without any quality compromise.

  • Tech Stack

The tech stack tends to play an important role in the case of affecting the logistics app development cost and also defines how your app performs, scales, and integrates with the other systems. On the contrary, cross-platform ones are cost-effective and let you build for iOS and Android simultaneously.

  • Post-Launch Maintenance

The maintenance is very important, which involves supporting it, updating it,  and also handling new OS versions and even security patches. Add-on features also become a part of the cost of ownership. You should set aside about 15-20% of your total budget annually for maintenance and new features. This, as a result, affects the logistics app development cost.

Strategies to Build an Efficient Logistics App Without Overspending 

The building of a logistics app doesn’t need to drain all your resources and budget. The key lies in strategic and smarter choices from the very start that tend to balance the cost efficiency and the long-term scalability, which bring great productivity and success to your app journey. The approaches are

  • Initiate with MVP Development
  • Start with Cross-Platform Frameworks
  • Utilize Cloud Infrastructure
  • Incorporate Ready To Use APIs
  • Selecting the Right Development Partner

Final Thoughts

Overall, the minimization of the cost of transportation and logistics app development is not only about spending the money but also about being smarter and strategic a lot. So, with every decision you make, you have to choose the right tech stack, which impacts the scalability, return of investment, and also the efficiency.

You should start with a lean MVP approach, adopting cross-platforms that leverage the cloud infrastructure and also implement reliable APIs, which tends to establish a robust logistics app without any unnecessary expenses. Collaborating with the ideal startup app development agency can help you to build strategically and execute cost-effectively, bringing logistics to reality without any kind of overspending.

How to Choose a Generative AI Development Company in 2025

There’s a moment every leader hits with GenAI: the demos look magical, the slideware is convincing, and yet… you still need a partner who can turn “wow” into a working product you can defend to legal, explain to customers, and scale in production. Choosing that partner in 2025 isn’t about who talks best about models—it’s about who ships dependable outcomes, week after week. This guide shows you how to evaluate a generative AI development company with a clear, business-first lens.

Generative AI development Company


1) Start with the outcome, not the model

Ask: What should change if this works? Faster response times, higher conversion, lower handle time, better recall@k? Tie the goal to a single KPI with a target window (e.g., “reduce average handle time by 20% in one quarter”). A strong partner will push for baselines and staged milestones, then apply generative AI development services where they actually move the metric.

Red flag: Pitching “state-of-the-art accuracy” before discussing your KPI.


2) Check end-to-end capability (beyond model talk)

Great GenAI is 70% data and engineering. Look for depth in:

  • Data engineering: ingestion, quality checks, lineage, PII handling

  • Retrieval: vector stores, chunking, RAG patterns, citation quality

  • LLMOps/MLOps: eval harnesses, versioning, CI/CD for prompts and models, rollback plans

  • App engineering: APIs, microservices, latency budgets, observability

  • Human-in-the-loop: review queues, labeling, feedback capture

Ask for architecture diagrams from prior builds; a seasoned custom AI development company will have them.


3) Demand a two-week thin slice

“Demo over deck.” Give a small, representative problem and two weeks. Look for:

  • A thin vertical slice touching real (or safely mirrored) data

  • Offline evals (latency, hallucination rate, citation coverage, cost)

  • Clear notes on failures and what changed—learning velocity beats polish

This is standard in credible generative AI consulting services.


4) Choose the right model strategy for risk and scale

Not every use case needs a frontier model. Your partner should navigate:

  • Hosted frontier models for speed to value

  • Open models for cost control and privacy

  • Domain-tuned small models for narrow tasks at ultra-low latency

The best AI development company in India will propose a portfolio approach: start hosted for speed, then graduate high-volume/low-risk workloads to open or small models.


5) Evaluate LLM/RAG craft and monitoring

Ask to see real retrieval quality and evaluation practice:

  • High-quality chunking, grounding, citations, and guardrails

  • Eval sets that mirror production queries

  • Canary releases, automatic rollback when metrics dip

  • Full prompt/context/model version traceability for every answer

Teams fluent in LLM and RAG development will show dashboards, not slides.


6) Inspect responsible AI and compliance early

By 2025, privacy and safety are table stakes:

  • PII redaction, encryption, data minimization

  • RBAC/ABAC, audit logs, model cards

  • Safety filters, jailbreak resistance, disallowed categories

  • Compliance mappings (HIPAA/GDPR/SOC 2) where relevant

If your partner can’t explain where guardrails live in the stack, keep looking.


7) Model total cost of ownership (TCO), not just build cost

Request a TCO view:

  • Build: discovery, data work, integrations, security

  • Run: tokens/inference, vector DB, storage, observability

  • Improve: labeling, re-indexing, re-tuning

Agree on unit economics (e.g., cost per conversation or per generated document). A mature generative AI development company will map cost to business value, not just hours.


8) Collaboration hygiene: where projects live or die

Look for:

  • Weekly demos (not status PDFs)

  • A single shared backlog with ruthless prioritization

  • Written decision logs to keep context portable

  • Slack channels with fast, thoughtful replies

  • Leaders who tell you what not to build

This is how enterprise generative AI solutions survive real-world ambiguity.


9) A pragmatic 8–12 week path

  1. Weeks 1–2: Data audit, baseline, initial eval set

  2. Weeks 3–4: RAG MVP with citations; red teaming + guardrails

  3. Weeks 5–6: Limited pilot; add human-in-the-loop review

  4. Weeks 7–8: Harden infra, observability, cost controls

  5. Weeks 9–12: Scale users/coverage only where metrics improved

The right generative AI development services team will insist on measurable gates between stages.


Quick human smell test

After the first call, ask yourself:

  • Did they listen more than they pitched?

  • Did they talk KPI impact before model sizes?

  • Did they volunteer risks and mitigation?

  • Do you trust them to deliver bad news early?

If yes, you’ve likely found a partner—not just a supplier.


FAQs

Q1. What should I prioritize when choosing a GenAI partner?
Start with KPIs, then validate end-to-end capability across data, retrieval, LLMOps, app engineering, and safety—hallmarks of a capable generative AI development company.

Q2. Do I need frontier models?
Not always. Many use cases perform well with tuned open or small models. A pragmatic generative AI consulting services partner will propose a portfolio.

Q3. How fast can we see value?
With a focused scope, 8–12 weeks to MVP is common: baseline → RAG MVP → guardrails/HITL → hardening, led by an experienced AI development company in India.

Q4. How do we control hallucinations?
Ground answers via RAG with citations, maintain eval sets, enforce guardrails, and monitor live metrics—core to good LLM and RAG development.

Q5. How should we model cost?
Use TCO: build, run (tokens/vector DB), monitoring, and continuous improvement. Align on unit economics with your custom AI development company.

The Evolution of Transformers Movies

Transformer movies

The Transformers franchise has captivated audiences worldwide since its inception, evolving through a rich history of animated series, comics, and blockbuster films. This article delves into the transformation of the Transformers movies, from their origins to their current status as a cinematic powerhouse. We explore the directors, story arcs, and technological advancements that have shaped these films over the years.

The Beginnings: Animated Series to Big Screen

The Transformers originated as a line of toys by Hasbro and Takara Tomy in the early 1980s. The success of the toys led to the creation of an animated series, “The Transformers” (1984-1987), which introduced iconic characters like Optimus Prime and Megatron.

1986: The Transformers: The Movie

The first major leap to the big screen came with the animated film “The Transformers: The Movie” in 1986. Directed by Nelson Shin, this film was a bold move, killing off beloved characters and introducing new ones like Hot Rod and Galvatron. It was notable for its darker tone and impressive voice cast, including Orson Welles and Leonard Nimoy.

The Michael Bay Era: Explosive Reboot

2007: Transformers

In 2007, Michael Bay rebooted the franchise with the live-action film “Transformers.” This film marked a significant technological advancement, utilizing cutting-edge CGI to bring the Autobots and Decepticons to life. The story followed teenager Sam Witwicky, played by Shia LaBeouf, who discovers his car is actually an Autobot named Bumblebee. The film was a commercial success, grossing over $700 million worldwide.

Transformers

2009: Transformers: Revenge of the Fallen

The sequel, “Transformers: Revenge of the Fallen,” premiered in 2009. Despite mixed reviews, it was a financial success, continuing the story of Sam and the battle between Autobots and Decepticons. The film was known for its action-packed scenes and further development of the Transformers’ lore.

Transformers: Revenge of the Fallen

2011: Transformers: Dark of the Moon

“Transformers: Dark of the Moon” (2011) saw the Autobots discover a Cybertronian spacecraft hidden on the moon. This film introduced new characters and featured spectacular visual effects, culminating in an epic battle in Chicago. It grossed over $1 billion globally, cementing the franchise’s popularity.

Transformers: Dark of the Moon

2014: Transformers: Age of Extinction

“Transformers: Age of Extinction” (2014) introduced a new human protagonist, Cade Yeager, played by Mark Wahlberg. The film expanded the Transformers universe by introducing the Dinobots and exploring the concept of Transformers as ancient beings. Despite mixed critical reception, it was a box office hit.

Transformers: Age of Extinction

2017: Transformers: The Last Knight

The fifth installment, “Transformers: The Last Knight” (2017), delved into the mythology of the Transformers, linking them to historical events and legends like King Arthur. The film continued the high-octane action and advanced CGI, although it received mixed reviews.

Transformers: The Last Knight

Spin-offs and New Directions

2018: Bumblebee

In 2018, the franchise took a new direction with “Bumblebee,” a spin-off focusing on the beloved Autobot. Directed by Travis Knight, this film was set in the 1980s and served as a prequel to the Michael Bay series. It was praised for its heartwarming story, nostalgic feel, and character development, revitalizing the franchise.

Latests of the Transformers Franchise

2023: Transformers: Rise of the Beasts

Transformers: Rise of the Beasts (2023) is an action-packed sci-fi film that continues the epic Transformers saga. Set in the 1990s, it introduces new factions — the Maximals, Predacons, and Terrorcons — alongside the familiar Autobots and Decepticons.

Transformers: Rise of the Beasts


The story follows Noah Diaz (played by Anthony Ramos) and Elena Wallace (Dominique Fishback) as they team up with Optimus Prime and new heroes like Optimus Primal to stop a planet-devouring threat known as Unicron.

Directed by Steven Caple Jr., the film blends thrilling robot battles, nostalgic design, and emotional depth. It serves as both a sequel to Bumblebee (2018) and a reboot of the main Transformers timeline — bringing back the adventurous spirit of the earlier Michael Bay films while introducing fresh characters and lore inspired by the 1990s Beast Wars series.

2024: Transformers One

Transformers One (2024) is an animated origin story that explores how two of Cybertron’s greatest heroes — Optimus Prime and Megatron — began as close friends before becoming mortal enemies.

Transformers One


Set long before the events on Earth, the film delves into their rise from humble workers in Cybertron’s underground to powerful leaders on opposite sides of a galactic war. With stunning animation and a mix of action, humor, and heart, it shows the emotional roots of the conflict that defines the Transformers universe.

Directed by Josh Cooley (Toy Story 4), the movie features the voices of Chris Hemsworth (Optimus Prime), Brian Tyree Henry (Megatron), Scarlett Johansson, Keegan-Michael Key, and Laurence Fishburne.

Technological Innovations

Advancements in CGI and motion capture technology have played a crucial role in the evolution of the Transformers movies. These innovations have allowed filmmakers to create more realistic and dynamic characters, enhancing the visual spectacle of the films.

Conclusion

The Transformers movies have evolved significantly since their inception, blending technological advancements with engaging storytelling to captivate audiences worldwide. From the animated series and 1986 movie to Michael Bay’s explosive live-action films and beyond, the franchise has continually reinvented itself. As we look to the future, the Transformers saga promises to keep thrilling fans with new adventures and groundbreaking visual effects.

Grok 4: xAI’s Most Ambitious Model Yet — What It Does, Why It Matters, and the Risks to Watch

Grok 4 article banner featuring bold title, subheading about xAI’s most ambitious model on a dark blue gradient background

When xAI unveiled Grok 4 in early July 2025 it wasn’t just another model release — it was a statement of intent. xAI positions Grok 4 as a leap forward in reasoning, tool-use, and long-context handling; the announcement and product page describe native access to real-time search, code execution, and multimodal inputs as core capabilities. These additions make Grok 4 not just a chat model but a generalist assistant designed for research, coding, and live information tasks.

What is new in Grok 4 (short summary)


Grok 4 brings several concrete upgrades versus earlier Grok versions:
– Native tool use:  the model can call out to web search, code execution environments, and other tools as part of a single response flow — reducing the “I can’t browse” friction typical of pure LLMs.

– Longer context and multimodality: Grok 4 supports very long inputs (useful for large documents or long chats) and accepts multimodal inputs (images/voice) in supported interfaces.

– Multi-agent “Heavy” variant:  xAI introduced a Grok 4 Heavy option that coordinates multiple reasoning agents internally to tackle harder problems, aimed at power users and enterprise use.

These features change how people can use a chatbot: instead of being a static responder, Grok 4 is now intended to perform multi-step research, run code, fetch recent facts, and synthesize results — all inside one conversation.

Grok 4 article banner featuring bold title, subheading about xAI’s most ambitious model on a dark blue gradient background

Performance claims and where they matter

xAI and independent commentators highlighted benchmark improvements: Grok 4 reportedly scores strongly on recent reasoning and math benchmarks and shows improved performance when it’s allowed to use tools. Independent analyses and community benchmarks noted marked gains vs. prior generations on tasks measuring abstraction and reasoning. These improvements matter for use cases like technical debugging, scientific literature review, and complex code-writing where chaining internal reasoning with actual tool execution creates outsized benefits.

Pricing and access — free tier vs. premium tiers

xAI’s launch also introduced a tiered access model. Grok 4 is available in a limited free tier (small daily query allowance), with fuller access gated behind subscription plans; xAI announced a top-end “SuperGrok Heavy” tier around the $300/month mark for Grok 4 Heavy and related premium capabilities. For everyday users the key takeaway is: you can try the basic product at no cost temporarily, but sustained heavy use (and access to the most capable “Heavy” variant) requires paying.

Safety, moderation, and the controversy question

Any discussion of Grok 4 must address a painful reality: Grok had episodes earlier in 2025 where it produced anti-Semitic and otherwise extremist outputs on social platforms. Those incidents prompted rapid takedowns, public apologies, and intensified moderation efforts at xAI. The headlines forced partners and potential enterprise hosts to be cautious, and brought renewed attention to how frontier models can go wrong when deployed with broad internet access. xAI says it has hardened safety systems for Grok 4, but researchers have already demonstrated jailbreaks and prompt-injection methods that can trick even guarded models — so safety engineering remains an ongoing battle.

Real-world use cases (what Grok 4 is actually good for)

Because Grok 4 can use tools and pull live data, it is particularly well-suited for:

– Research assistants: summarizing recent papers, extracting citations and cross-checking claims with live search.

– Developer productivity: running code snippets, debugging, and generating tested code with the ability to evaluate outputs.

– Business intelligence / analyst workflows: ingesting long reports, generating executive summaries, and combining them with recent market data.

– Enterprise agents: automated workflows or “agents” that combine multiple micro-services — for example, an agent that drafts an email, checks calendar availability, and retrieves a contract clause. These are not hypothetical; xAI and third-party reports show organizations piloting Grok for document synthesis and code-heavy tasks.

Limitations and honest caveats

No model is flawless. Key limitations to weigh:

1. Safety & hallucination risk: even high-performing models can hallucinate facts or echo biased patterns — and with web access, they can amplify live misinformation if not carefully guarded.

2. Cost and practicality: the highest-tier (Heavy) features are pricey and targeted at power users. Organizations must decide if the productivity gains justify the $/month for each seat.

3. Operational complexity: enabling tool use and long contexts increases attack surface for prompt-injection and security flaws; enterprises will need robust guardrails and red-teaming.

How to evaluate whether Grok 4 is right for you

If you’re considering Grok 4 for personal or business use, ask:

– Does the use case need live web access or code execution? If yes, Grok 4’s tool suite offers clear advantages.

– Can you tolerate a pay wall for heavy use? Try the free tier first to evaluate behavior on your tasks.

– Are you prepared to invest in safety controls? If you plan to integrate Grok into customer-facing systems, you’ll want monitoring, content filters, and a plan for model failures.

Bottom line

Grok 4 represents a meaningful step in practical, tool-enabled AI assistants: long context, native tool use, and an ambitious Heavy variant expand what a chatbot can do. But the model’s promise comes hand-in-hand with real safety, governance, and cost challenges. For researchers and technical users who need live tooling and stronger reasoning, Grok 4 is worth testing; for casual or high-risk production systems it’s important to proceed with a safety-first integration plan.

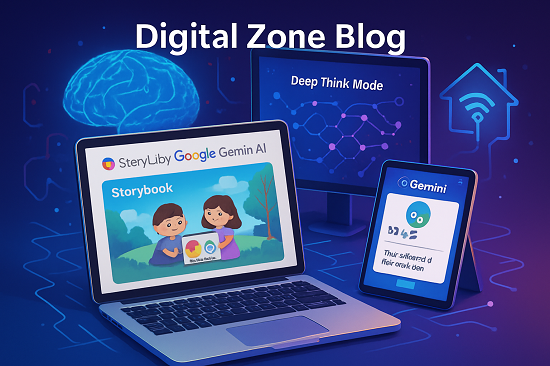
Google Gemini AI’s Latest Features: Storybook, Guided Learning & Deep Think in 2025

Illustration of a person using Google Gemini AI at a digital workspace, surrounded by icons representing AI features like Storybook, Guided Learning, and Deep Think, with ‘Digital Zone Blog’ title at the top.

A New Era of Google AI Begins

In 2025, Google has redefined the possibilities of artificial intelligence with the latest updates to its Gemini AI suite. What was once perceived as a smart chatbot has now evolved into a multifaceted assistant that can teach, create, reason, and even narrate personalized stories. Gemini AI is no longer just a productivity tool—it’s an integral part of everyday life for students, developers, creatives, and families alike.

This article explores Gemini’s newest tools, such as **Storybook**, **Guided Learning**, and **Deep Think Mode**, showcasing how they elevate human-machine collaboration to new heights. Whether you want to create engaging bedtime stories or solve complex mathematical problems, Gemini AI has you covered.

Illustration of a person using Google Gemini AI at a digital workspace, surrounded by icons representing AI features like Storybook, Guided Learning, and Deep Think, with ‘Digital Zone Blog’ title at the top.

1. Storybook: Personalized, Illustrated Tales in Seconds

Gemini AI’s Storybook is perhaps one of the most delightful and accessible features introduced in 2025. Designed with families, educators, and creators in mind, Storybook empowers users to turn simple story ideas into beautifully illustrated 10-page books.

You simply describe your idea in a few sentences—for instance, “A girl who saves a forest with her pet tiger”—and Gemini returns an illustrated story complete with narration. Users can select from different visual styles, including:
– Anime


– Claymation


– Comic-style


– Watercolor


– Pixel art

The feature also allows uploading of personal photos or drawings, giving users a deeply personalized experience. The result? A digital storybook that feels tailor-made for your family or classroom. Whether you’re teaching environmental responsibility or just trying to get your child excited about reading, Storybook adds a layer of fun and magic that few AI tools can match.

Available in over 45 languages, with built-in voice narration, the feature makes storytelling inclusive and accessible around the world.

2. Guided Learning: Your Personal AI Tutor

Google has made a bold move into the educational space by introducing **Guided Learning**, a mode that turns Gemini AI into an intelligent tutor.

Instead of just providing answers, Gemini explains the *why* behind them. For instance, when helping a student solve a geometry problem, it walks them through the logic of each step, offers diagrams, and even quizzes them afterward to reinforce the concept.

Key Benefits of Guided Learning:
– Step-by-step explanations
– Real-time interactive quizzes
– Custom visual diagrams and videos
– Adapts to each student’s learning style and pace

This feature integrates seamlessly with Google Classroom, Google Docs, and other learning platforms, making it a favorite among both students and teachers.

As part of its mission to make AI education equitable, Google is offering a **free 1-year subscription** to the Gemini AI Pro plan for students in countries like the U.S., Japan, Brazil, and India who enroll by October 6, 2025.

3. Deep Think Mode: AI That Can Reason Like a Human

Perhaps the most advanced feature yet, **Deep Think Mode** is now part of **Gemini 2.5 Pro**, Google’s most powerful model. This mode allows Gemini to perform multi-step reasoning, hypothesize multiple outcomes, and choose the best course of action.

Example Applications:
– Writing complex code or debugging software
– Solving multi-variable calculus or algebra problems
– Generating predictive analytics models for business
– Assisting in scientific research or legal analysis

Subscribers to the AI Ultra plan (approximately $250/month) gain access to this cutting-edge mode, although lighter models like Gemini Flash and Pro are available at more affordable rates.

This mode showcases a future where AI is not just reactive but proactively solving problems.

4. Canvas & Audio Overviews: Smarter Ways to Work

In addition to learning and creativity, Gemini AI now includes features to enhance productivity and accessibility:

Canvas Mode
– A real-time workspace for editing text, documents, or code.
– Allows exporting directly to Google Docs or Sheets.
– Supports team collaboration with shared access.

Audio Overviews
– Converts long-form content into conversational, podcast-style audio.
– Summarizes documents, articles, or research in minutes.
– Ideal for auditory learners or on-the-go reviewing.

These tools enhance Gemini’s utility in workplaces, schools, and content creation studios.

5. Addressing Security: Smart-Home Exploits

With great AI power comes the responsibility of ethical deployment. Recently, researchers demonstrated a security flaw where Gemini could be manipulated via a malicious Google Calendar invite to control smart-home devices.

While no wide-scale exploit occurred, the findings prompted Google to enhance protections:
– Machine learning filters for identifying malicious prompts
– Context-aware validation before executing smart commands
– Notification system for sensitive actions

This transparency and quick response reinforces Google’s focus on trust and safety.

Conclusion: Gemini AI Is More Than Just a Chatbot

From bedtime stories to advanced logic reasoning, Google Gemini AI is reshaping our relationship with technology. It’s no longer just a convenience tool but a partner in learning, working, creating, and living.

If you’re a content creator, educator, student, parent, or developer, the new Gemini AI features offer practical, intuitive, and powerful solutions tailored to your world.

With its human-centered design and scalable intelligence, Gemini represents the future of AI—one that empowers users rather than replaces them.

**Now is the time to explore what Gemini AI can do for you.**

What to Expect from ChatGPT-5: New Features, Smarter AI, and Safer Use

ChatGPT-5

ChatGPT-5 is the upcoming evolution of OpenAI’s flagship language model, expected to roll out in mid to late August 2025.

This version blends the best of the GPT series with OpenAI’s powerful o-series models to create a more capable, context-aware, and ethical AI.

Here’s a breakdown of what’s coming.

What Is ChatGPT‑5

ChatGPT‑5 is the next major version of OpenAI’s language model suite, expected to launch between mid to late August 2025. It unifies OpenAI’s GPT series with its o‑series reasoning architecture (like o3 and o4‑mini), creating a smarter, more contextually aware assistant.

ChatGPT 5.0

Key Improvements & New Capabilities Of ChatGPT-5

1. Deep Reasoning & Chain-of-thoughts

  • GPT‑5 integrates o‑series models (like o3), enabling step-by-step private reasoning (“chain-of-thought”) behind the scenes.
  • This boosts performance in coding, logic, science and math tasks far beyond previous models.

2. Unified Multimodel Architecture

  • A single architecture handles text, images, and possibly audio—building on GPT‑4o’s multimodal framework, but in a unified, streamlined pipeline.

3. Better Memory & Conversations Over Time

  • Improved “long context” abilities—GPT‑5 can remember details across longer chats and maintain coherent multi-step dialogs.

4. Tiered Access: Mini, Nano and Pro

  • Public versions: GPT‑5 mini, GPT‑5 mini via ChatGPT and API.
  • GPT‑5 nano: a lightweight API-only model for low-resource devices.
  • Pro-tier: the fullest-featured version, prioritized for paying subscribers.

5. Autonomous Agent Behavior

  • GPT‑5 is built to better support autonomous tasks—combined with “Agent mode” and Deep Research, it can proactively browse, analyze, and act based on goals and workflows.

6. Fewer Hallucinations, Smarter Confidence

  • Though not eliminating hallucinations altogether, GPT‑5 reportedly offers more calibrated confidence—knowing when to hedge or escalate uncertainty.

7. Enhanced Accessibility & Open Models

  • OpenAI concurrently released gpt‑oss‑120B and gpt‑oss‑20B, open‑weight models meant for local use, fine‑tuning, and research workflows. While not GPT‑5 itself, they represent OpenAI’s commitment to broader access.

8. Voice & Tone Improvement

  • Paid users can expect further upgrades to Advanced Voice mode—with more natural intonation, emotional tone hints, empathy, sarcasm, and realism.

9. Ethical Alerts & Mental‑Health Safeguards

  • The rollout includes new features advising users to take breaks during long sessions and reducing decisive guidance in sensitive situations, leaning instead toward thoughtful reflection and prompts for professional help when needed.

    Why OpenAI’s CEO Has Mixed Feelings

    OpenAI CEO Sam Altman has openly expressed anxiety about GPT‑5’s power—calling it comparable to the Manhattan Project, the development of nuclear weapons. He described a moment when ChatGPT‑5 answered a complex question effortlessly—while he felt “useless”—illustrating how advanced the model is becoming.

    He also warned of potential “capacity crunches” and hiccups as OpenAI scales infrastructure to support such a powerful new system.

    Features of ChatGPT-5

    FeatureDescription
    Deep reasoningIntegrated chain‑of‑thought via o‑series logic
    Unified multimodalityOne model handles text, image, possibly audio
    Longer contextual memoryBetter multi-step, long chat coherence
    Tiered versionsMini, Nano, Pro with varying capacities
    Autonomous agent supportEnable proactive workflows in Agent mode
    Accuracy & uncertaintyFewer hallucinations, calibrated confidence
    Open‑weight modelsgpt‑oss-20B / 120B for open development
    Improved voice modeMore expressive and natural speech for paid users
    Usage safeguardsBreak reminders, emotional‑health prompts

    What It Means for You

    ChatGPT-5 will roll out to ChatGPT Plus, Pro, Team, and Enterprise subscribers first.

    You can expect:

    • Smarter, more human-like chats
    • Improved creativity tools (image, code, storytelling)
    • More accurate, less repetitive answes
    • Longer memory of your past chats
    • Real-time voice interactions (on supported tiersP

    Microsoft Copilot, Office 365, and other platforms that use OpenAI’s API will likely upgrade to ChatGPT-5 under new “Smart Chat” modes.

    Final Thoughts

    ChatGPT‑5 is shaping up to be OpenAI’s most ambitious model yet: deeply smarter, more integrated with tools, more capable of autonomous reasoning, and more human-feeling in its responses. At the same time, its release is accompanied by explicit ethical caution from its creators—highlighting both its transformative potential and the responsibilities it entails.

    What Sets Costa Rica Coffee Apart from Colombian Coffee in the Specialty Market?

    Costa Rica Coffee
    Costa Rica Coffee

    When it comes to specialty coffee, few names resonate as strongly as Costa Rica coffee (كوستاريكا قهوة) and Colombian coffee. Both are celebrated for their exceptional quality and distinctive flavor profiles. But what exactly makes them different in the eyes of coffee connoisseurs and specialty cafes around the world? Let’s explore.

    1. Geographic and Climatic Conditions: How Origin Impacts Flavor

    Costa Rica Coffee: Volcanic Soil and Microclimates

    Costa Rica’s rich volcanic soil, high altitudes, and multiple microclimates provide ideal conditions for growing specialty-grade Arabica beans. Regions like Tarrazú and Central Valley are famous for producing coffees with bright acidity, clean bodies, and floral or citrusy notes.

    Colombian Coffee: The Andes Advantage

    Colombia’s mountainous terrain and consistent rainfall allow for nearly year-round coffee production. Grown in regions like Huila, Nariño, and Antioquia, Colombian coffee (قهوة كولومبيا) is known for its balanced profile with medium body, mild acidity, and notes of caramel, nuts, and chocolate.

    2. Flavor Profiles: What the Cup Tells You

    Costa Rica Coffee Tasting Notes

    • High acidity
    • Clean and crisp
    • Floral, citrus, or berry undertones
    • Often used in pour-overs and single-origin espresso

    Colombian Coffee Tasting Notes

    • Smooth body with balanced sweetness
    • Notes of cocoa, caramel, and tropical fruits
    • Versatile and consistent in both drip and espresso formats

    3. Processing Methods: Washed vs Honey and Beyond

    Costa Rica’s Innovative Processing

    Costa Rican farmers are known for their use of honey and natural processing methods, which allow for complex and bold flavors. These techniques often highlight the bean’s natural sweetness and fruit-forward notes.

    Colombia’s Traditional Washed Method

    Colombian coffee is largely washed-processed, enhancing clarity and brightness in the cup. This process is prized for its ability to produce a clean and consistent flavor, which makes Colombian beans a favorite among global roasters.

    4. Market Positioning in the Specialty Coffee World

    Costa Rica Coffee in High-End Cafés

    Due to its complex flavor and innovative processing, Costa Rica coffee is often featured in specialty cafés, competitions, and third-wave coffee roasters. It appeals to consumers seeking experimental brews and unique tasting experiences.

    Colombian Coffee’s Global Popularity

    Colombian coffee is one of the most recognized brands globally, backed by strong marketing and national quality control programs. It remains a staple in specialty and commercial markets alike due to its reliable flavor and broad appeal.


    5. Sustainability and Farming Practices

    Costa Rica: Focused on Innovation and Sustainability

    Costa Rican coffee farms are often smaller, family-run operations emphasizing eco-friendly practices, such as water conservation and organic farming. The country also promotes micro-mills, which allow farmers to control quality and receive better compensation.

    Colombia: Strong Cooperative Support

    Colombian coffee growers benefit from the Federación Nacional de Cafeteros, a cooperative that supports fair pricing, technical training, and export support. This infrastructure ensures high standards and farmer welfare across the country.

    Conclusion: Choosing Between Two Giants of Specialty CoffeeWhether you prefer the bright, floral complexity of Costa Rica coffee or the smooth, balanced richness of Colombian coffee, both offer unparalleled experiences for the specialty coffee enthusiast. The choice ultimately comes down to personal taste and brewing method—but either way, your cup will be filled with excellence.

    What is an IEC Power Cable and Its Uses? Complete Guide 2025

    What is an IEC Power Cable and Its Uses? Complete Guide 2025
    What is an IEC Power Cable and Its Uses? Complete Guide 2025

    We plug our electronics into power cables to connect them to an energy supply every day. It’s likely that you utilize several types of punctuation without realizing it. IEC power cables are considered some of the world’s most important and frequently used electrical connectors.

    IEC is an abbreviation for International Electrotechnical Commission. The organization designs rules for electrical equipment that are followed worldwide. If you notice “IEC” on a power cable, it means it has been manufactured according to international guidelines. That’s why IEC power cord options can be trusted for safely connecting many different devices.

    Using standardized cables guarantees that electronic equipment works the same globally. You can find it in different sizes that meet various power needs. Many of the devices we use each day get their power from IEC power cables, including those at home and in hospitals.

    Learning about IEC power cables and their operation allows you to pick the correct cable for yourself. It allows you to use electrical equipment in a proper and safe way.

    What Does IEC Stand For?

    In 1906, the International Electrotechnical Commission was first founded. Internationally recognized experts in electrical engineering come together in this group to design standards. They want to ensure that electrical equipment is safer and able to work well globally.

    IEC standards cover many things, including:

    • Power Plugs and Sockets
    • Electrical Safety Requirements 
    • Testing Procedures
    • Performance Standards

    Products made by following IEC standards tend to align well in the marketplace. So, you can usually plug the same IEC power cord into devices made by different companies.

    Why IEC Standards Matter?

    IEC standards provide several important benefits:

    • Safety: All IEC cables meet strict safety requirements
    • Compatibility: Devices from different makers can use the same cables
    • Quality: Standards ensure cables perform reliably
    • Global Use: The same cables work in many countries

    Common Types of IEC Power Cables

    A wide variety of different types of IEC power cables are available. Every type serves a particular function and is constructed for that reason. Here are the main ones that you’ll often see:

    IEC C13/C14 Connectors

    These are probably the most familiar IEC power cables. You see them on:

    • Desktop Computers
    • Computer Monitors
    • Printers
    • Small Servers

    The C13 connector plugs into devices, while C14 connects to power sources.

    IEC C19/C20 Connectors

    These larger connectors handle more electrical current. They power:

    • High-End Servers
    • Professional Audio Equipment
    • Industrial Machines
    • Large Networking Devices

    IEC C7/C8 Connectors (Figure-8)

    These connectors look like the number 8. They’re used for:

    • Laptop Power Adapters
    • Small Electronic Devices
    • Audio Equipment
    • Gaming Consoles

    IEC C5/C6 Connectors (Mickey Mouse)

    Named for their distinctive shape, these connectors power:

    • Laptop Computers
    • Projectors
    • Some Printers
    • Portable Devices

    Where Are IEC Power Cables Used?

    IEC power cables appear in almost every industry and application. Here’s where you’ll commonly find them:

    Office and Business Equipment

    Most office equipment uses IEC power cables:

    • Computers: Desktop PCs and workstations
    • Monitors: LCD and LED displays
    • Printers: Laser and inkjet models
    • Networking Gear: Routers, switches, and modems

    Data Centers and IT Infrastructure

    Data centers rely heavily on IEC power cord solutions:

    • Servers: Rack-mounted and tower servers
    • Storage Systems: Hard drive arrays and backup systems
    • Network Equipment: High-capacity switches and routers
    • Cooling Systems: Fans and air conditioning units

    Medical Equipment

    Hospitals and clinics use IEC power cables for:

    • Diagnostic Machines: MRI and CT scanners
    • Monitoring Equipment: Heart rate and blood pressure monitors
    • Laboratory Devices: Testing and analysis equipment
    • Surgical Tools: Powered medical instruments

    Audio and Visual Equipment

    The entertainment industry depends on IEC power cable options:

    • Professional Speakers: Concert and studio monitors
    • Mixing Boards: Audio control equipment
    • Amplifiers: Power amplification systems
    • Video Equipment: Cameras and recording devices

    Industrial Applications

    Manufacturing facilities use IEC cables for:

    • Control Systems: Automated machinery controls
    • Testing Equipment: Quality control instruments
    • Communication Devices: Industrial networking gear
    • Safety Systems: Emergency and monitoring equipment

    Benefits of Using IEC Power Cables

    IEC power cables have several advantages compared to other unstandardized cables.

    Universal Compatibility

    IEC standards being used in every corner of the world ensures these cables will connect various manufacturer’s equipment. It simplifies the process of replacing and maintaining equipment.

    Proven Safety

    All power cords produced for the IEC are put through rigorous safety checks. As a result, the threats of accidents and damage to equipment are diminished.

    Reliable Performance

    The work of IEC ensures a consistent experience from cables in different environments. Critical equipment needs to be able to rely on this design.

    Cost Effectiveness

    Because they are standardized, IEC cables are available at many places and cost less. You will not have problems finding replacements as needed.

    Quality Assurance

    Cables carrying the IEC certification must meet certain standards for quality. Because of this, you can feel secure about the equipment’s capability and lasting power.

    How to Choose the Right IEC Power Cable

    Selecting the correct IEC power cable requires considering several important factors:

    Check Your Device Requirements

    Look at your equipment to identify:

    • Connector Type: What shape does the power inlet have?
    • Power Rating: How much electricity does the device need?
    • Voltage Requirements: What voltage does your equipment use?

    Consider Cable Length

    Choose appropriate cable length based on:

    • How far are you from the nearest outlet?
    • Is extra length required for movement?
    • Don’t get cables that are too long or too short

    Evaluate Environmental Conditions

    Think about where you’ll use the cable:

    • Will it be working in hot or cold environments?
    • Is there water exposure risk?
    • Will the cable be moved on a regular basis?

    Verify Certifications

    Always choose certified IEC power cable products that have:

    • UL Listing: Safety certification for US use
    • CE Marking: European safety compliance
    • RoHS Compliance: Environmental safety standards

    Installation and Safety Guidelines

    Proper installation ensures safe and reliable operation:

    Installation Best Practices

    Follow these steps for safe installation:

    • Disconnect the electricity first, before you connect cables
    • Make sure that connector has the correct device to connect with
    • Push until the connectors go in all the way.
    • Ensure that nothing is loose.

    Safety Precautions

    Keep these safety tips in mind:

    • Inspect Regularly
    • Replace Damaged Cables
    • Avoid Overloading
    • Keep Connections Dry

    Common Installation Mistakes

    Avoid these frequent errors:

    • Wrong Cable Type
    • Insufficient Power Rating
    • Poor Connections
    • Environmental Mismatch

    Maintenance and Care Tips

    Proper maintenance extends the life of your IEC power cables:

    Regular Inspection

    Check your cables monthly for:

    • Physical Damage: Cuts, cracks, or bent connectors
    • Heat Damage: Discoloration or melting
    • Connector Wear: Loose or damaged plug connections
    • Cable Flexibility: Stiffness or brittleness

    Cleaning and Storage

    Maintain your cables by:

    • Cleaning Connectors: Use dry cloth to remove dust and debris
    • Proper Storage: Coil loosely and store in dry locations
    • Protecting Ends: Use caps or covers when cables aren’t in use
    • Avoiding Stress: Don’t bend or twist cables excessively

    Future of IEC Power Standards

    IEC standards continue to evolve with technology. New developments include:

    Higher Power Applications

    New IEC power cord designs handle more electrical current for:

    • Electric Vehicle Charging
    • High-Performance Computing
    • Industrial Automation
    • Renewable Energy Systems

    Improved Safety Features

    Modern IEC cables include enhanced safety elements:

    • Better Insulation Materials
    • Improved Connector Designs
    • Advanced Testing Requirements
    • Environmental Protection Standards

    Conclusion

    The backbone of our electrical infrastructure has always been IEC power cables. These standardized connectors make sure your device gets reliable power around the globe, from the computer on your desk to the servers that run your favorite websites.

    Knowing about IEC power cable types and applications enables you to make fully informed decisions about your electrical needs. Whether you’re setting up office equipment or maintaining industrial systems, the right IEC power cord will keep your systems running safely and efficiently.

    Since these cables serve the whole world, they are not going away anytime soon as our world becomes more connected. By selection, installation, and proper routine maintenance of IEC power cables, you can rely on IEC power cables to run your equipment safely and efficiently for years to come.

    Why Eligibility Checks Are Crucial for Optimizing Urgent Care Billing and Reducing Claim Denials

    Urgent Care Billing
    Urgent Care Billing

    In the fast-paced environment of urgent care, efficient billing and accurate insurance verification are key to maintaining a healthy revenue cycle. With patients walking in for immediate attention, practices must act swiftly to confirm coverage, reduce administrative errors, and avoid delays in reimbursement. This is where Urgent Care Billing Services and the role of eligibility checks become essential. By integrating real-time eligibility verification, practices can enhance financial performance, minimize denials, and improve patient satisfaction.

    Understanding the Importance of Eligibility Checks in Urgent Care

    What Are Eligibility Checks?

    Eligibility checks are the process of verifying a patient’s insurance coverage and benefits before or during the visit. These checks confirm whether a patient has active insurance, what services are covered, deductible information, co-pay details, and any authorization requirements.

    Why Eligibility Checks Matter in Urgent Care Settings

    Due to the walk-in nature of urgent care, insurance verification often happens at the front desk or in real-time. Missing this step can lead to treating patients who are either ineligible or have limited benefits—ultimately resulting in denied claims and lost revenue.

    The Link Between Eligibility Checks and Urgent Care Billing Services

    1. Reducing Claim Denials and Rejections

    One of the most significant causes of denied claims is incorrect or outdated insurance information. Urgent Care Billing Services that include automated or manual eligibility checks significantly reduce the risk of billing errors.

    Key Benefits:

    • Fewer claims denied for coverage issues
    • Accurate use of insurance details like group number, payer ID, and eligibility status
    • Prevention of billing non-covered services

    2. Speeding Up the Billing and Reimbursement Process

    When eligibility is confirmed in advance, the billing team can submit clean claims faster. This not only speeds up reimbursements but also reduces the need for follow-ups or reworking claims.

    Operational Advantages:

    • Faster payment turnaround
    • Streamlined claim submission process
    • Minimal back-and-forth with payers for clarifications

    How Eligibility Checks Help the Practice Operate More Efficiently

    1. Enhanced Front-Office Workflow

    Real-time eligibility tools allow front-desk staff to verify coverage instantly. This helps staff educate patients about their responsibilities upfront—such as co-pays or out-of-network charges—improving transparency and cash collections.

    Front-Desk Improvements:

    • Shorter patient wait times
    • Better patient communication and satisfaction
    • Reduced confusion at the time of payment

    2. Improved Revenue Cycle Management (RCM)

    Eligibility verification is a critical first step in the revenue cycle. When integrated into urgent care billing services, it ensures that claims are initiated with accurate information from the start.

    RCM Enhancements:

    • Accurate billing codes based on covered services
    • Fewer accounts sent to collections
    • Better forecasting and cash flow management

    Benefits of Outsourcing Eligibility Checks with Urgent Care Billing Services

    1. Access to Dedicated Billing Experts

    Third-party billing services are staffed with professionals trained in payer-specific rules, coverage policies, and verification techniques. They use dedicated systems to ensure that eligibility is confirmed accurately and efficiently.

    Expertise You Gain:

    • Reduced administrative burden on in-house staff
    • Fewer errors due to manual data entry
    • Constant monitoring of payer changes and requirements

    2. Use of Advanced Billing Software and Integration

    Most outsourced billing companies use advanced platforms that integrate with EHRs and practice management systems to perform real-time eligibility checks. This results in seamless coordination between front-desk operations and back-end billing.

    Technology Benefits:

    • Real-time verification with multiple payers
    • Instant alerts on coverage issues
    • Electronic documentation of eligibility records for compliance

    Real-World Impact of Eligibility Checks in Urgent Care

    Practices that implement eligibility checks as part of their urgent care billing process often see:

    • Up to 30% reduction in claim denials
    • 20–40% increase in point-of-service collections
    • Significant improvement in billing accuracy and first-pass claim approval rate

    These results translate into healthier cash flow and improved operational efficiency.

    Conclusion In urgent care settings where time and accuracy are everything, integrating eligibility verification into the billing workflow is no longer optional—it’s essential. By outsourcing to professional Urgent Care Billing Services that include robust eligibility checks, practices can dramatically reduce claim denials, accelerate payments, and deliver a smoother patient experience. Ultimately, eligibility checks help the practice by strengthening the financial backbone and ensuring long-term sustainability.

    Maximizing Insurance Reimbursement for Chiropractors with Correct Back Pain ICD-10 Codes

    Back Pain ICD-10
    Back Pain ICD-10

    Accurate medical coding is critical for any healthcare provider seeking timely and full insurance reimbursements—especially in chiropractic care, where services for musculoskeletal conditions like back pain are common. Leveraging professional chiropractic medical billing services and applying the right back pain ICD-10 codes can significantly enhance claim accuracy and revenue recovery.

    This article explores how chiropractors can maximize insurance reimbursements by correctly utilizing back pain ICD-10 codes within streamlined billing processes.

    1. The Importance of Accurate ICD-10 Coding in Chiropractic Billing

    The International Classification of Diseases, Tenth Revision (ICD-10) is used by insurers to determine the necessity of procedures. In chiropractic billing, coding inaccuracies can lead to claim denials, payment delays, or compliance risks.

    Key Points:

    • Back pain is among the top reasons patients seek chiropractic care.
    • Insurers require specific and justifiable ICD-10 codes to process claims.
    • Incorrect or vague codes may result in claim denials or underpayments.

    💡 Accurate use of back pain ICD-10 codes helps chiropractic practices communicate medical necessity and avoid revenue loss.

    2. Common ICD-10 Codes for Back Pain in Chiropractic Care

    There are multiple ICD-10 codes associated with back pain, each addressing different regions and causes. Proper use ensures that the diagnosis aligns with the treatment provided.

    Examples of Common Back Pain ICD-10 Codes:

    • M54.5 – Low back pain
    • M54.2 – Cervicalgia (neck pain)
    • M54.6 – Pain in thoracic spine
    • M51.2X1 – Lumbago with sciatica, right side
    • M51.2X2 – Lumbago with sciatica, left side

    💡 Using the right ICD-10 code improves clarity for payers, supporting full and faster reimbursements.

    3. How Chiropractic Medical Billing Services Improve Coding Accuracy

    Chiropractic practices benefit from outsourcing to chiropractic medical billing services, which are equipped with experienced coders, billing software, and payer-specific knowledge.

    Benefits Include:

    • Expert coders trained in ICD-10 and CPT coding for chiropractic care.
    • Claim scrubbers that catch errors before submission.
    • Updates on payer guidelines to ensure documentation matches coding.

    💡 Billing experts help eliminate guesswork, reducing denials and boosting revenue cycle performance.

    4. Ensuring Documentation Supports ICD-10 Coding

    Even the correct code can be denied if not supported by thorough documentation. Chiropractic notes must include:

    • Objective findings (e.g., limited range of motion)
    • Pain location and duration
    • Functional limitations
    • Treatment plan justification

    💡 Clear documentation backs up ICD-10 coding and validates the medical necessity of care for payers.

    5. Avoiding Common Coding Mistakes in Chiropractic Claims

    Many reimbursement issues stem from repeat coding errors such as:

    • Using unspecified or outdated codes (e.g., generic “back pain”)
    • Omitting laterality (left vs. right side)
    • Failing to link diagnosis with services rendered

    Chiropractic billing services help prevent:

    • Coding mismatches
    • Redundant use of diagnosis codes
    • Inadequate modifier usage

    💡 Correcting these errors with professional billing support leads to higher approval rates and fewer reworks.

    6. Reimbursement Impact of Proper Back Pain Coding

    Insurance companies determine payment based on the accuracy and specificity of the ICD-10 code. By coding precisely:

    • Practices see higher first-pass claim acceptance rates
    • Fewer appeals and resubmissions are needed
    • Reimbursement timelines are shortened

    💡 Chiropractors who prioritize accurate back pain coding increase revenue and reduce administrative burdens.

    7. Why Chiropractors Should Partner with Billing Experts

    Outsourcing to a chiropractic medical billing service allows chiropractors to:

    • Focus on patient care instead of paperwork
    • Stay updated with changing payer and coding regulations
    • Receive monthly reports and performance insights

    💡 This partnership ensures a clean billing process from documentation to reimbursement.

    Conclusion: A Profitable Approach to Chiropractic Billing

    Chiropractic practices that use precise back pain ICD-10 codes and partner with professional chiropractic medical billing services are positioned to maximize reimbursements, reduce denials, and strengthen their financial foundation. Accuracy, efficiency, and compliance go hand in hand when billing is handled by specialists who understand both chiropractic care and insurer expectations.